Arduino is not only a microcontroller or an IDE to program microcontrollers, it’s a constantly evolving ecosystem of hardware, tools, programs, libraries and services, which makes it easy getting started programming and sharing your creations. GitHub enable simple sharing of Arduino sketches and libraries. With the new GitHub Actions, automated workflows can be setup for these open source projects.
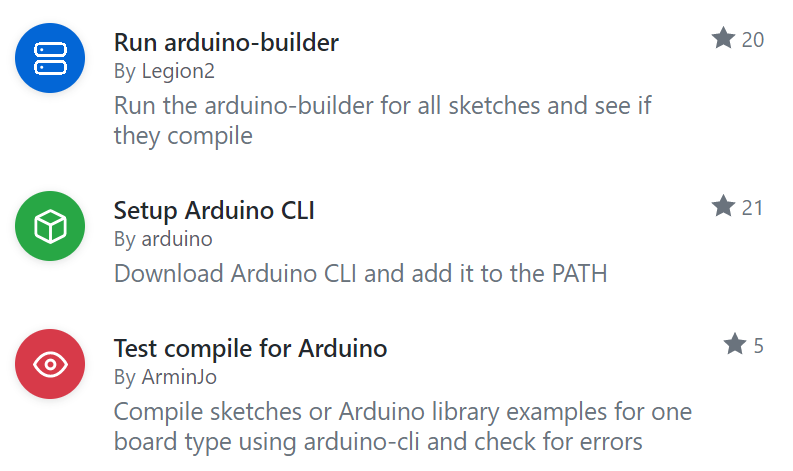
Back then in the GitHub Actions alpha in February 2019 I created the Run arduino-builder Action. It started as simple tool to automate testing of my Arduino library project with GitHub Actions. In November 2019 Arduino announced its own GitHub Action using their new Arduino CLI. The Arduino CLI was introduced to provide a single reference implementation for many parts of the Arduino ecosystem. It can be used for simple and complex use cases.
The Arduino CLI was built with advanced workflows in mind and as mentioned before is provided as GitHub Action to enable easy Continuous Integration. In the following we will discuss how the Arduino CLI can be used to verify Arduino libraries and sketches automatically. I will also describe how you can migrate your Arduino Builder workflows to an Arduino CLI workflows and benefit from the straightforward and familiar use.
We will only discuss how you can verify, that your Arduino code can be compiled and does not produce compiler warnings. This is the lowest level in the “Test Pyramid” below the unit tests! We will not cover unit and integration tests.
Arduino CLI
The Arduino CLI (Arduino Command Line Interface) is a command line tool called arduino-cli.
With the Arduino CLI you can do everything you can do with the Arduino IDE:
- Create sketches
- Install libraries
- Manage boards
- Compile code
- Upload to Arduino boards
Arduino CLI can be installed on Linux, Mac and Windows. For our workflow in GitHub Actions we will use a Linux environment.
Verify library with examples
The most common use case for verifying Arduino code is, when you write a library.
But the Arduino CLI can only compile sketches, so you can not directly compile your library source code.
When writing an Arduino library, you most probably also provide examples, for user how to use your library.
These examples are Arduino sketches in the examples/ directory of the library.
So, the Arduino CLI is used to compile the example sketches of the library and indirectly compile and verify the library source code.
But before you can compile your library you may need to install additional libraries and boards. It’s important to know that the GitHub Actions workflow environment is empty and does not include any library or board by default. All libraries used in your library and the boards you use to compile must be installed before you can compile your library.
The Arduino CLI can install libraries and boards simply by providing their name. For all the details see the Arduino CLI reference.
Setup GitHub Action Workflow
If you are not familiar with GitHub Actions, please first read GitHub help page.
Abstract overview of the steps in the GitHub Actions workflow:
- Install Arduino CLI
- Install Libraries
- Install Cores/Boards
- Compile sketch
To get started, create a basic GitHub Actions workflow file in your library repository. We will now discuss every step of the workflow. Starting with the first step of almost every GitHub Actions workflow, the checkout of the repository with the source code.
- uses: actions/checkout@master
The Arduino CLI can be installed using the official GitHub Action. This Action install the Arduino CLI in the workflow environment so it can be used in the next steps.
- uses: arduino/setup-arduino-cli@v1.0.0
To test your code, it must be installed as library. We want to test the current version of the library that was committed and triggered to workflow. The source code is already checked out in the first step of the workflow, so we only install it in the Arduino libraries directory.
- run: |
    mkdir -p "$HOME/Arduino/libraries"
    ln -s "$PWD" "$HOME/Arduino/libraries/."
To install the required libraries, add a step to the workflow, e.g. installing the FastLED library with a specific version:
- run: arduino-cli lib install "FastLED@3.2.0"
Depending on the boards you want to compile the library for you now must install a different core.
For example, if you want to compile for an Arduino Uno you need the arduino:avr core:
- run: |
    arduino-cli core update-index
    arduino-cli core install arduino:avr@1.8.2
A “core” (or platform) is a collection of tools and definitions required to compile and upload to a specific board.
3rd party hardware vendors can create own cores, so you can compile and upload to 3rd party boards with the Arduino CLI.
To install a 3rd party core, you need not only the name of the core, but also an url that defines a list of files.
The following example shows how SparkFun:avr core is installed using the board manager url.
- run: |
    arduino-cli core update-index --additional-urls https://raw.githubusercontent.com/sparkfun/Arduino_Boards/master/IDE_Board_Manager/package_sparkfun_index.json
    arduino-cli core install SparkFun:avr@1.1.5 --additional-urls https://raw.githubusercontent.com/sparkfun/Arduino_Boards/master/IDE_Board_Manager/package_sparkfun_index.json
Finally, an example sketch is compiled to verify your library source code.
Therefore you must specify the Fully Qualified Board Name (FQBN), e.g. arduino:avr:uno and the path to the example sketch.
You can also add the --warnings option to enable more warnings.
- run: arduino-cli compile --fqbn arduino:avr:uno ./examples/SimpleExampleSketch --warnings more
When committed and pushed to GitHub, it will trigger the first run of the workflow. When your library code can’t be compiled the workflow run will fail. But we expect your library compiles without problems and the workflow run succeed without errors. You can access all workflow runs from the “Actions” tab of your GitHub repository page.
You can also create a status badges for your workflow. They show the current status of your workflow run. Simply select a workflow in the “Actions” tab overview and then click “Create status badge”.
![]()
For a complete example of a workflow file see below.
Arduino test compile Action

An alternative to the setup of the Arduino CLI with multiple steps and configuration options, is the Test compile for Arduino Action by ArminJo. The Action combines all the required steps into a single Docker GitHub Action. You specify all the libraries, cores, FQBN and the sketch to compile in one place.
Migration from Arduino Builder to Arduino CLI
Arduino Builder is a command line tool for compiling Arduino sketches, like Arduino CLI but it can only compile sketches. Using Arduino Builder requires manual setup of Arduino libraries, cores and boards. Arduino Builder was deprecated in favor of Arduino CLI.
The Arduino Builder was not intended to be used directly, instead it is used by Arduino IDE in the background.
This made it inconvenient and difficult to use arduino-builder in workflows, but it was the only option before the Arduino CLI.
To improve this situation, I created some Actions and documentation on how to run arduino-builder in GitHub Actions.
But now as that Arduino Builder is deprecated and Arduino CLI provides all features in one tool, it’s time to migrate to Arduino CLI. I included one of mine Arduino Builder workflows as an example.
Example GitHub Actions workflow using Arduino Builder:
on: [push, pull_request]
name: Test
jobs:
  test16u2:
    name: Test 16u2 ${{ matrix.sketch }} for ${{ matrix.board }}
    runs-on: ubuntu-latest
    strategy:
      matrix:
        sketch: [HoodLoader2CLPBridge]
        board: ["HoodLoader2:avr:HoodLoader2atmega16u2:board=uno", "HoodLoader2:avr:HoodLoader2atmega16u2:board=mega2560"]
    steps:
    - uses: actions/checkout@master
    - name: Install FastLED
      uses: Legion2/download-release-action@master
      with:
        repository: FastLED/FastLED
        tag: '3.2.0'
        path: libraries
    - name: Download HoodLoader2
      uses: Legion2/download-release-action@master
      with:
        repository: NicoHood/HoodLoader2
        tag: '2.0.5'
        path: hardware/HoodLoader2
        file: '2.0.5-boards_manager.zip'
    - name: Install HoodLoader2
      run: |
        cd hardware/HoodLoader2
        sudo mv 2.0.5-boards_manager.zip some.zip
        sudo unzip some.zip
        sudo rm some.zip
        sudo mv * avr
    - name: Build ${{ matrix.sketch }} for ${{ matrix.board }}
      uses: Legion2/arduino-builder-action@v2.0.0
      with:
        board: ${{ matrix.board }}
        sketch: ./examples/${{ matrix.sketch }}/${{ matrix.sketch }}.ino
This example workflow with Arduino Builder does basically the same as the workflow we created with Arduino CLI above, expect that this example uses the strategy.matrix feature.
Realizing this workflow with Arduino CLI is straightforward.
Create a new workflow as described above, install the same libraries and cores and compile the sketch for the given board.
Example GitHub Actions workflow after migration using Arduino CLI:
on: [push, pull_request]
name: Test
jobs:
  test16u2:
    name: Test 16u2 ${{ matrix.sketch }} for ${{ matrix.board }}
    runs-on: ubuntu-latest
    strategy:
      matrix:
        sketch: [HoodLoader2CLPBridge]
        board: ["HoodLoader2:avr:HoodLoader2atmega16u2:board=uno", "HoodLoader2:avr:HoodLoader2atmega16u2:board=mega2560"]
    steps:
    - uses: actions/checkout@master
    - uses: arduino/setup-arduino-cli@v1.0.0
    - name: Install repo as library
      run: |
        mkdir -p "$HOME/Arduino/libraries"
        ln -s "$PWD" "$HOME/Arduino/libraries/."
    - name: Install FastLED
      run: arduino-cli lib install FastLED@3.2.0
    - name: Install Arduino core
      run: |
        arduino-cli core update-index
        arduino-cli core install arduino:avr@1.8.2
    - name: Install HoodLoader2
      run: |
        arduino-cli core update-index --additional-urls https://raw.githubusercontent.com/NicoHood/HoodLoader2/master/package_NicoHood_HoodLoader2_index.json
        arduino-cli core install HoodLoader2:avr@2.0.5 --additional-urls https://raw.githubusercontent.com/NicoHood/HoodLoader2/master/package_NicoHood_HoodLoader2_index.json
    - name: Build ${{ matrix.sketch }} for ${{ matrix.board }}
      run: arduino-cli compile --fqbn ${{ matrix.board }} ./examples/${{ matrix.sketch }} --warnings more
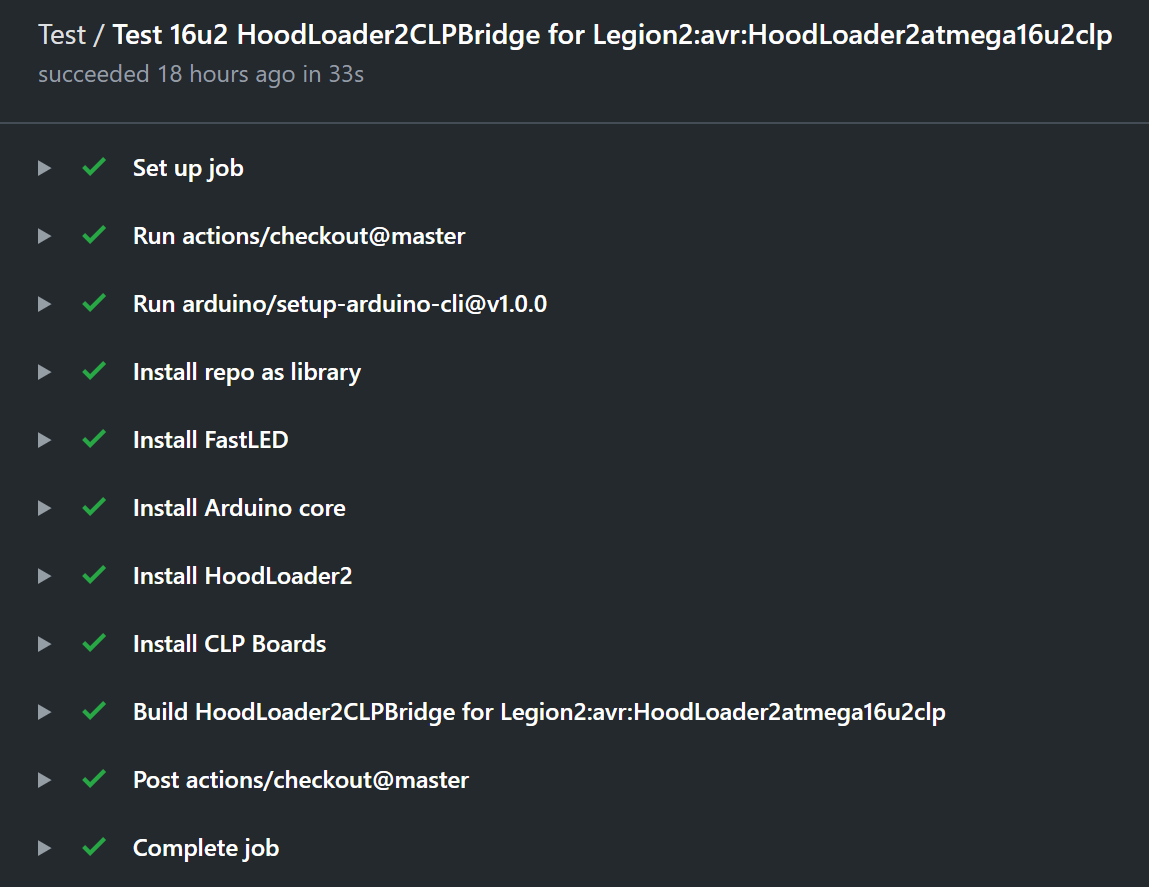
In the following I will compare the Arduino Builder and Arduino CLI workflows.
The only part that changes with the migration are the steps of the workflow.
When installing libraries for Arduino Builder you had to download and install the library from zip files.
With Arduino CLI you just call arduino-cli lib install with the name of the library.
Using 3rd party boards with Arduino Builder require manual download and installation.
The manual installation of a core is complex because you need to download the core definition from somewhere and then get it in the correct format and directory structure.
With Arduino CLI you use the board manager url of the core and then install it with arduino-cli core install.
To compile the sketches the arduino-builder program requires many parameters like installation path of cores, tools and libraries.
With Arduino CLI you simply call arduino-cli compile and give it the FQBN and sketch path.
I hope you learned something from reading this blog post and now start creating test workflows for your Arduino projects. If you have any comments, feedback or questions use GitHub or Twitter